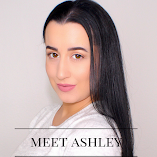
While everyone has been posting this beautiful ultra-glam makeup tutorials for the holidays and New Year's Eve, I have decided to share this natural and simple glam makeup look for those girls that don't need anything too glittery, sparkly or over-the-top.
For this look I decided to keep the face and lips neutral and cool toned, while making sure to emphasize the "glam" part of this look all within the eyes. The eye makeup is made more gorgeous with deep browns, beiges and greys, and made flawlessly elegant with lengthening mascara and fluffy falsies.
As they say, if you fall in love with someone's eyes you will fall in love forever. This is especially important for those midnight kisses on New Year's Eve.
Let's get this tutorial started!
For this look I decided to keep the face and lips neutral and cool toned, while making sure to emphasize the "glam" part of this look all within the eyes. The eye makeup is made more gorgeous with deep browns, beiges and greys, and made flawlessly elegant with lengthening mascara and fluffy falsies.
As they say, if you fall in love with someone's eyes you will fall in love forever. This is especially important for those midnight kisses on New Year's Eve.
Let's get this tutorial started!

The Face
Primer, Foundation and Concealer
1. I moisturize my face with Clinique Dramatically Different Moisturizing Cream and my under eye area with Origins GinZing Refreshing Eye Cream.
2. I prime my skin with NYX Angel Veil Skin Perfecting Primer and prime my under eye area with ELF Studio Hydrating Under Eye Primer.
3. Using a Beauty Blender, I apply a mix of the Kat Von D Lock-It Tattoo Foundaton in Light 49 and Maybelline Fit Me Foundation in Soft Tan to my entire face.
4. To highlight and conceal I use the Urban Decay Naked Skin Weightless Concealer in Light Warm in a V-shape beneath my eyes, in the middle of my forehead, down the bridge of my nose, on my chin, and on my eye lids.
2. I prime my skin with NYX Angel Veil Skin Perfecting Primer and prime my under eye area with ELF Studio Hydrating Under Eye Primer.
3. Using a Beauty Blender, I apply a mix of the Kat Von D Lock-It Tattoo Foundaton in Light 49 and Maybelline Fit Me Foundation in Soft Tan to my entire face.
4. To highlight and conceal I use the Urban Decay Naked Skin Weightless Concealer in Light Warm in a V-shape beneath my eyes, in the middle of my forehead, down the bridge of my nose, on my chin, and on my eye lids.
Powder Setting, Contour and Blush
1. To set
everything I take the Real Techniques Setting Brush and place a mixture of the
highlight shades Lucid and Lyric from the Kat Von D Shade and Light Contour Palette and place a generous amount over the areas that I highlighted with
concealer.
2. I also add a generous amount to my jaw directly below my contour line. I allow the extra powder to sit on my skin for a few minutes to "bake" before brushing off with a Morphe Brushes G23 Soft Fan Brush.
2. I also add a generous amount to my jaw directly below my contour line. I allow the extra powder to sit on my skin for a few minutes to "bake" before brushing off with a Morphe Brushes G23 Soft Fan Brush.
3. With the Real Techniques Sculpting Brush
I take the contour shade Sombre from the Kat Von D palette and contour
beneath my cheekbones, underneath my jaw bone, along the hairline on my
forehead, down my temples, and alone the parallel sides of the bridge of
my nose.
4. After blending I apply the NARS Blush in Orgasm, a peachy pink shimmer, using the BH Cosmetics Blush Brush.
4. After blending I apply the NARS Blush in Orgasm, a peachy pink shimmer, using the BH Cosmetics Blush Brush.
Highlight
1. Using
the same fan brush as earlier, I then apply the Jaclyn Hill and Becca Highlight in Champagne Pop to the tops of my cheekbones, my forehead just above my brows, and
the bridge of my nose.
2. I highlight over this with NARS Albatross, a white highlight with gold shimmer.
Brows
2. I highlight over this with NARS Albatross, a white highlight with gold shimmer.
Brows
1. I shape my brows with the Anastasia Beverly Hills Brow Wiz in Ebony.
2. I fill it in with the Anastasia Beverly Hills Brow Powder Duo in Dark Brown.
3. Finally, I set my brows into place with the Anastasia Beverly Hills Clear Brow Gel.

1. Using the Kat Von D Shade and Light Eye Contour Palette, I take the shade Lazarus, a cool taupe, with a BH Cosmetics Fluffy Blending Brush into the crease of my eye and start blending upward. This is going to be our transition shade.
1. I apply the shade Ludwin, a peachy bronze, directly across from lid from inner corner to outer corner.
Outer Corner, Liner and Wing
1. I apply Benefit Roller Lash Mascara to my upper and lower lashes.
2. For my falsies I choose Huda Beauty lashes in Giselle and apply them using the Vegas Nay by Eylure Waterproof Lash Glue.

The Lips
1. For this look I wanted something that was wearable in texture and color. I fill in and line my lips with Kat Von D Everlasting Liquid Lipstick in the shade Bow N Arrow, a fawn nude.
2. I apply several dabs of Kat Von D Everlasting Liquid Lipstick in Noble, a petal pink nude, to my inner pout.
3. Using my ring finger I blend Noble outward into Bow N Arrow until the two colors are evenly blended together.
4. I set the entire look with the Mario Badescu Facial Setting Spray.
I Want To Know...
2. I fill it in with the Anastasia Beverly Hills Brow Powder Duo in Dark Brown.
3. Finally, I set my brows into place with the Anastasia Beverly Hills Clear Brow Gel.

The Eyes
Transition Shade
1. Using the Kat Von D Shade and Light Eye Contour Palette, I take the shade Lazarus, a cool taupe, with a BH Cosmetics Fluffy Blending Brush into the crease of my eye and start blending upward. This is going to be our transition shade.
Crease and Lid
1. I apply the shade Ludwin, a peachy bronze, directly across from lid from inner corner to outer corner.
2. I then apply the shade Solas, an espresso brown, directly into my crease with a BH Cosmetics Small Tapered Blending Brush
using windshield wiper motions.
3. I reapply Solas a couple times into my crease to build the color, making sure it blends into my transition shade but stays directly within the crease.
3. I reapply Solas a couple times into my crease to build the color, making sure it blends into my transition shade but stays directly within the crease.
Outer Corner, Liner and Wing
1. I
use the shade Shax, a jet black, to define my outer
corner. I apply this directly to the outer third of my eye lid with a BH Cosmetics Tapered Blending Brush
in the shape of a sideways "V."
2. While I make sure to concentrate Shax only to the outer corner area, I take it up into my crease and down into my lower lash line ever so slightly so as to enhance the deep eye effect.
2. While I make sure to concentrate Shax only to the outer corner area, I take it up into my crease and down into my lower lash line ever so slightly so as to enhance the deep eye effect.
3. I take the NYX Gel Liner in Jet Black with a BH Cosmetics Small Eye Defining Brush and draw a thin line as close as I can to my lash line.
4. I continue the gel liner and make a small defining wing ending just shortly past my outer corner.
4. I continue the gel liner and make a small defining wing ending just shortly past my outer corner.
Highlight and Lower Lash Line
1. I
use the shade Shimma Shimma by Makeup Geek, a metallic champagne, to highlight
the inner tear duct with a BH Cosmetics Fluffy Blending Brush, and a small flat shadow brush
to highlight my brow bone just below my eyebrow.
2. I take the shade Shax again and glide it below my bottom lash
line using a small eye defining brush, making sure to blend into the
outer corner of my eye to give the entire look a rounded out eye.
3. I go over the bottom half of Shax with our original transition shade, Lazarus, to blend out any harshness.
3. I go over the bottom half of Shax with our original transition shade, Lazarus, to blend out any harshness.
Mascara and Falsies
1. I apply Benefit Roller Lash Mascara to my upper and lower lashes.
2. For my falsies I choose Huda Beauty lashes in Giselle and apply them using the Vegas Nay by Eylure Waterproof Lash Glue.

The Lips
1. For this look I wanted something that was wearable in texture and color. I fill in and line my lips with Kat Von D Everlasting Liquid Lipstick in the shade Bow N Arrow, a fawn nude.
2. I apply several dabs of Kat Von D Everlasting Liquid Lipstick in Noble, a petal pink nude, to my inner pout.
3. Using my ring finger I blend Noble outward into Bow N Arrow until the two colors are evenly blended together.
4. I set the entire look with the Mario Badescu Facial Setting Spray.
I Want To Know...
Tell me about your New Year's Eve! What type of makeup will you wear? What plans have you made?